
2021 was definitely the year of the kitchen remodel. A huge thank you and apology to all my friends and family that had to endure it along with us! To start, I am a natural planner. I am also very organized and I am totally Type A. These can all be great qualities when planning a large home renovation. However, if you have ever done a renovation then you know that sometimes it does not matter how well you plan, external factors are always at play and can have a major impact on the project.
Change of Plans Before We Even Started
I started planning for this project in December of 2020. Talking to my contractor, designing and picking out materials, etc. The whole kitchen was being designed around our Hallman 48″ Range. I saw this range on @theramblingredhead on Instagram and immediately fell in love. The range is made-to-order in Italy and given all the craziness with Covid, especially in Italy at that time, I knew that I needed to get the range ordered way in advance. March 1st I ordered our range that was to arrive in 16-20 weeks – perfect timing for our July 5th renovation start.
Narrator: But the range would not arrive in 16-20 weeks to arrive.
Again, as a planner, I was coordinating the renovation to begin while our family and dogs were on vacation in Maine. John and Drake were planning to be in Maine for the first two weeks (avoiding the demo phase), while I was going to stay in Maine for the whole month with the dogs. Our contractor had quoted us 4-6 weeks to complete the project.
Narrator: HA HA HA, the kitchen would not be complete in 4-6 weeks.
Well, one week before the project was supposed to start our contractor pulled out of the job. Yeah. To say that I was stressed was an understatement. In a panic, I called the designer we were working with in absolute tears. With everything going on with Covid, it was impossible to find a contractor in such a short period of time. Jessica was amazing and said that she would help. She had just redone her own kitchen herself and we would use the same crews to do our kitchen. I mean, it was such a relief and I cannot express how thankful I am that she stepped up to the challenge. Little did we know what curveballs life was about to throw our way.
Also while we were figuring out how to move forward with the kitchen, Drake (my 8 yo stepson) was diagnosed with Type 1 Diabetes. Three days before we were supposed to drive to Maine, Drake was admitted to Children’s Hospital for three days. In the final hour, we decided it would be best for John and Drake to stay home and I still drive to Maine with the dogs. I will tell you, it was so hard to leave and we were so torn about whether to just scrap the kitchen project altogether. Knowing what we know now, we probably should have delayed this project a year but we didn’t… there were a lot of pain points but the outcome made it all worth it. Because we got our dream kitchen!
The Kitchen Before
My husband likes to remind me on a regular basis that when we moved into this house my exact words were, “This house is perfect! Turnkey. We do not need to change a thing!” Yeah, yeah, I did say those words. But y’all know how it is when you are looking at houses, it’s all rose-colored glasses and rainbows. And honestly, I didn’t mind the kitchen, at first. It was painted blue and white which are my favorite colors and it was much bigger than my current kitchen.
But after about 6 months of living in it, you start to realize the things you would do differently. Everything was builder-grade and the quality was just kind ugh. I guess I should be a little nicer about it, the house was built in 2004 so it’s had some wear and tear. Basically it boils down to it being outdated and not my personal style. Here are some before pics:

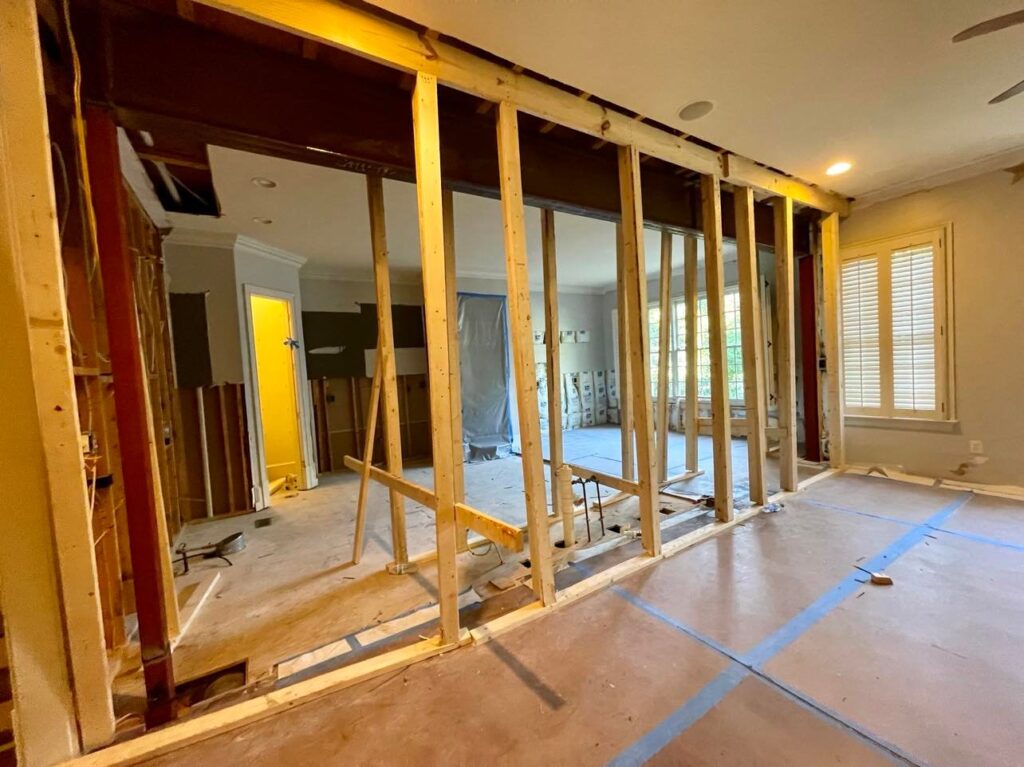
So most notably, there are two structurally important columns in the middle of the kitchen. Those absolutely had to go. That was the number one that I knew we had to change. I also was not a fan of the Tuscan-faux-stone tile floor situation. There was also zero counter/prep space. So basically, it was going to be a complete gut job.
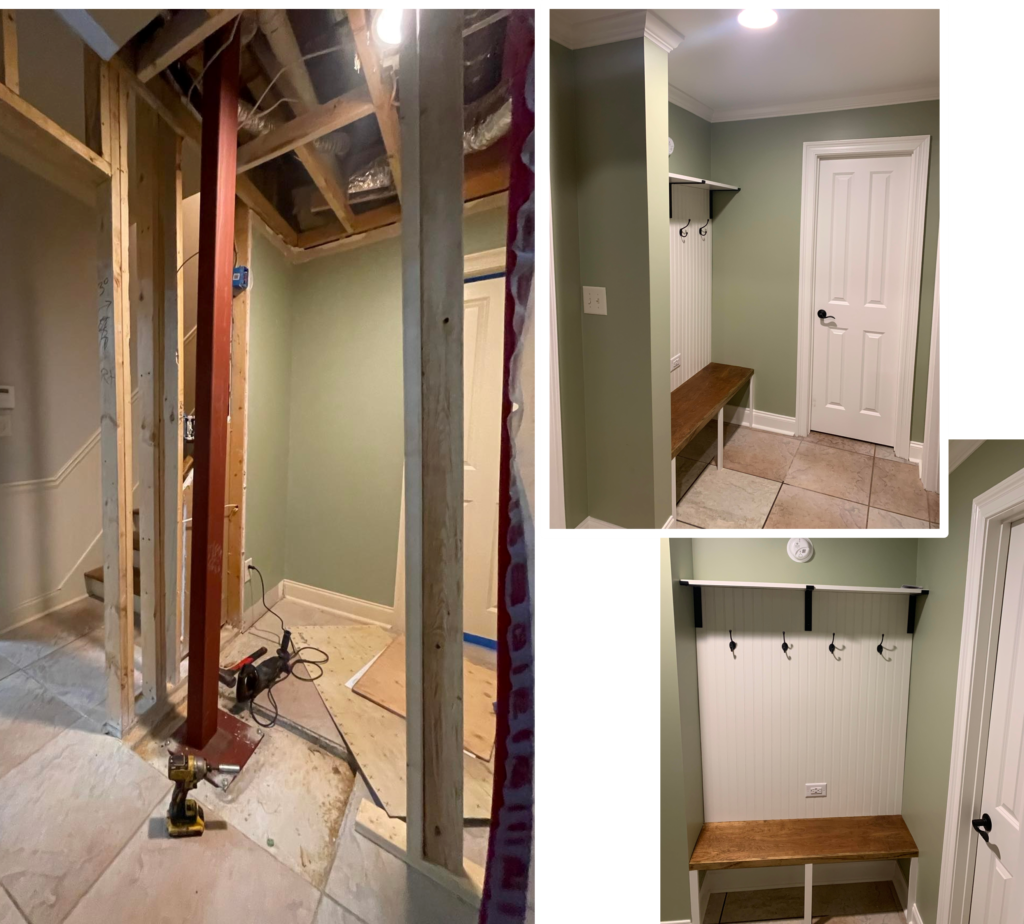
This beam was quite the undertaking. It was HUGE. Commercial-grade. We had to get it in through the window in the dining room and then they had these fancy machines to jack it up into place. In the pic above you will also see that we had to run posts from the kitchen to the rooms beneath. The post on the far right was fine and contained within the existing wall. The one on the left you will see ended up sticking out in the middle of the hallway in the man cave. This was NOT part of the original plan or budget because then we had to do a mini project down there to incorporate the new post.
So I am going to skip over all the aches and pains of this project. There were a lot of hiccups, some personal family matters that same up, workers getting Covid, me getting Covid, material shortages, basically, you name it, we experienced it. BUT, it was all worth it in the end. Here are the after pics with some of the deets!

TA-DAAAA! With the column gone, it is now completely open and the perfect entertaining space! We decided to encase the beam in molding rather than drywall. Second to removing the columns, I knew I wanted to have paneled appliances. I wanted them all to blend into the cabinets and really let the range shine. On the side of the island you are seeing above, is the paneled beverage cooler with a cabinet where we store our blenders and some pans and hot plates.

Sooooooo much more open now. We changed the orientation of the island so that the sink is now in front of the range. We also opted not to do pendant lights and instead just canned lighting. I kind of teetered on this because in all the design blogs you see beautiful pendant lights but for this space, I think we made the right decision. The whole point was to open up the space and the pendant lights would just kind of block the line of sight for the space we just opened up. On this side of the island, we have a paneled nugget ice maker and another cabinet for baking sheets and cutting boards.
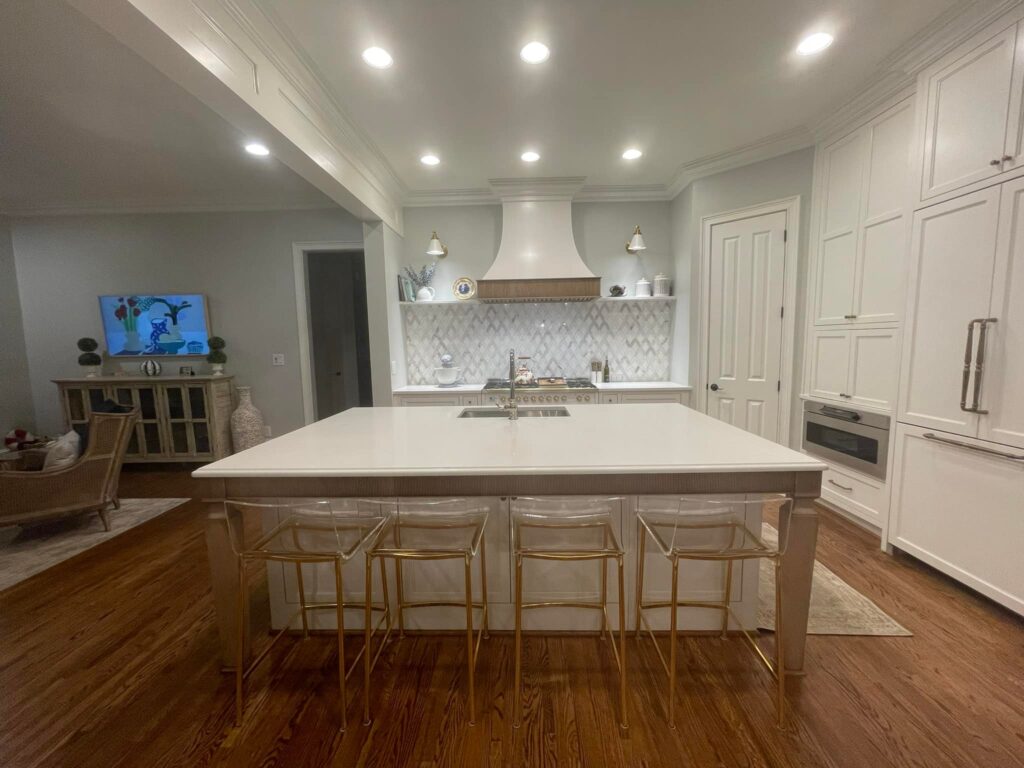
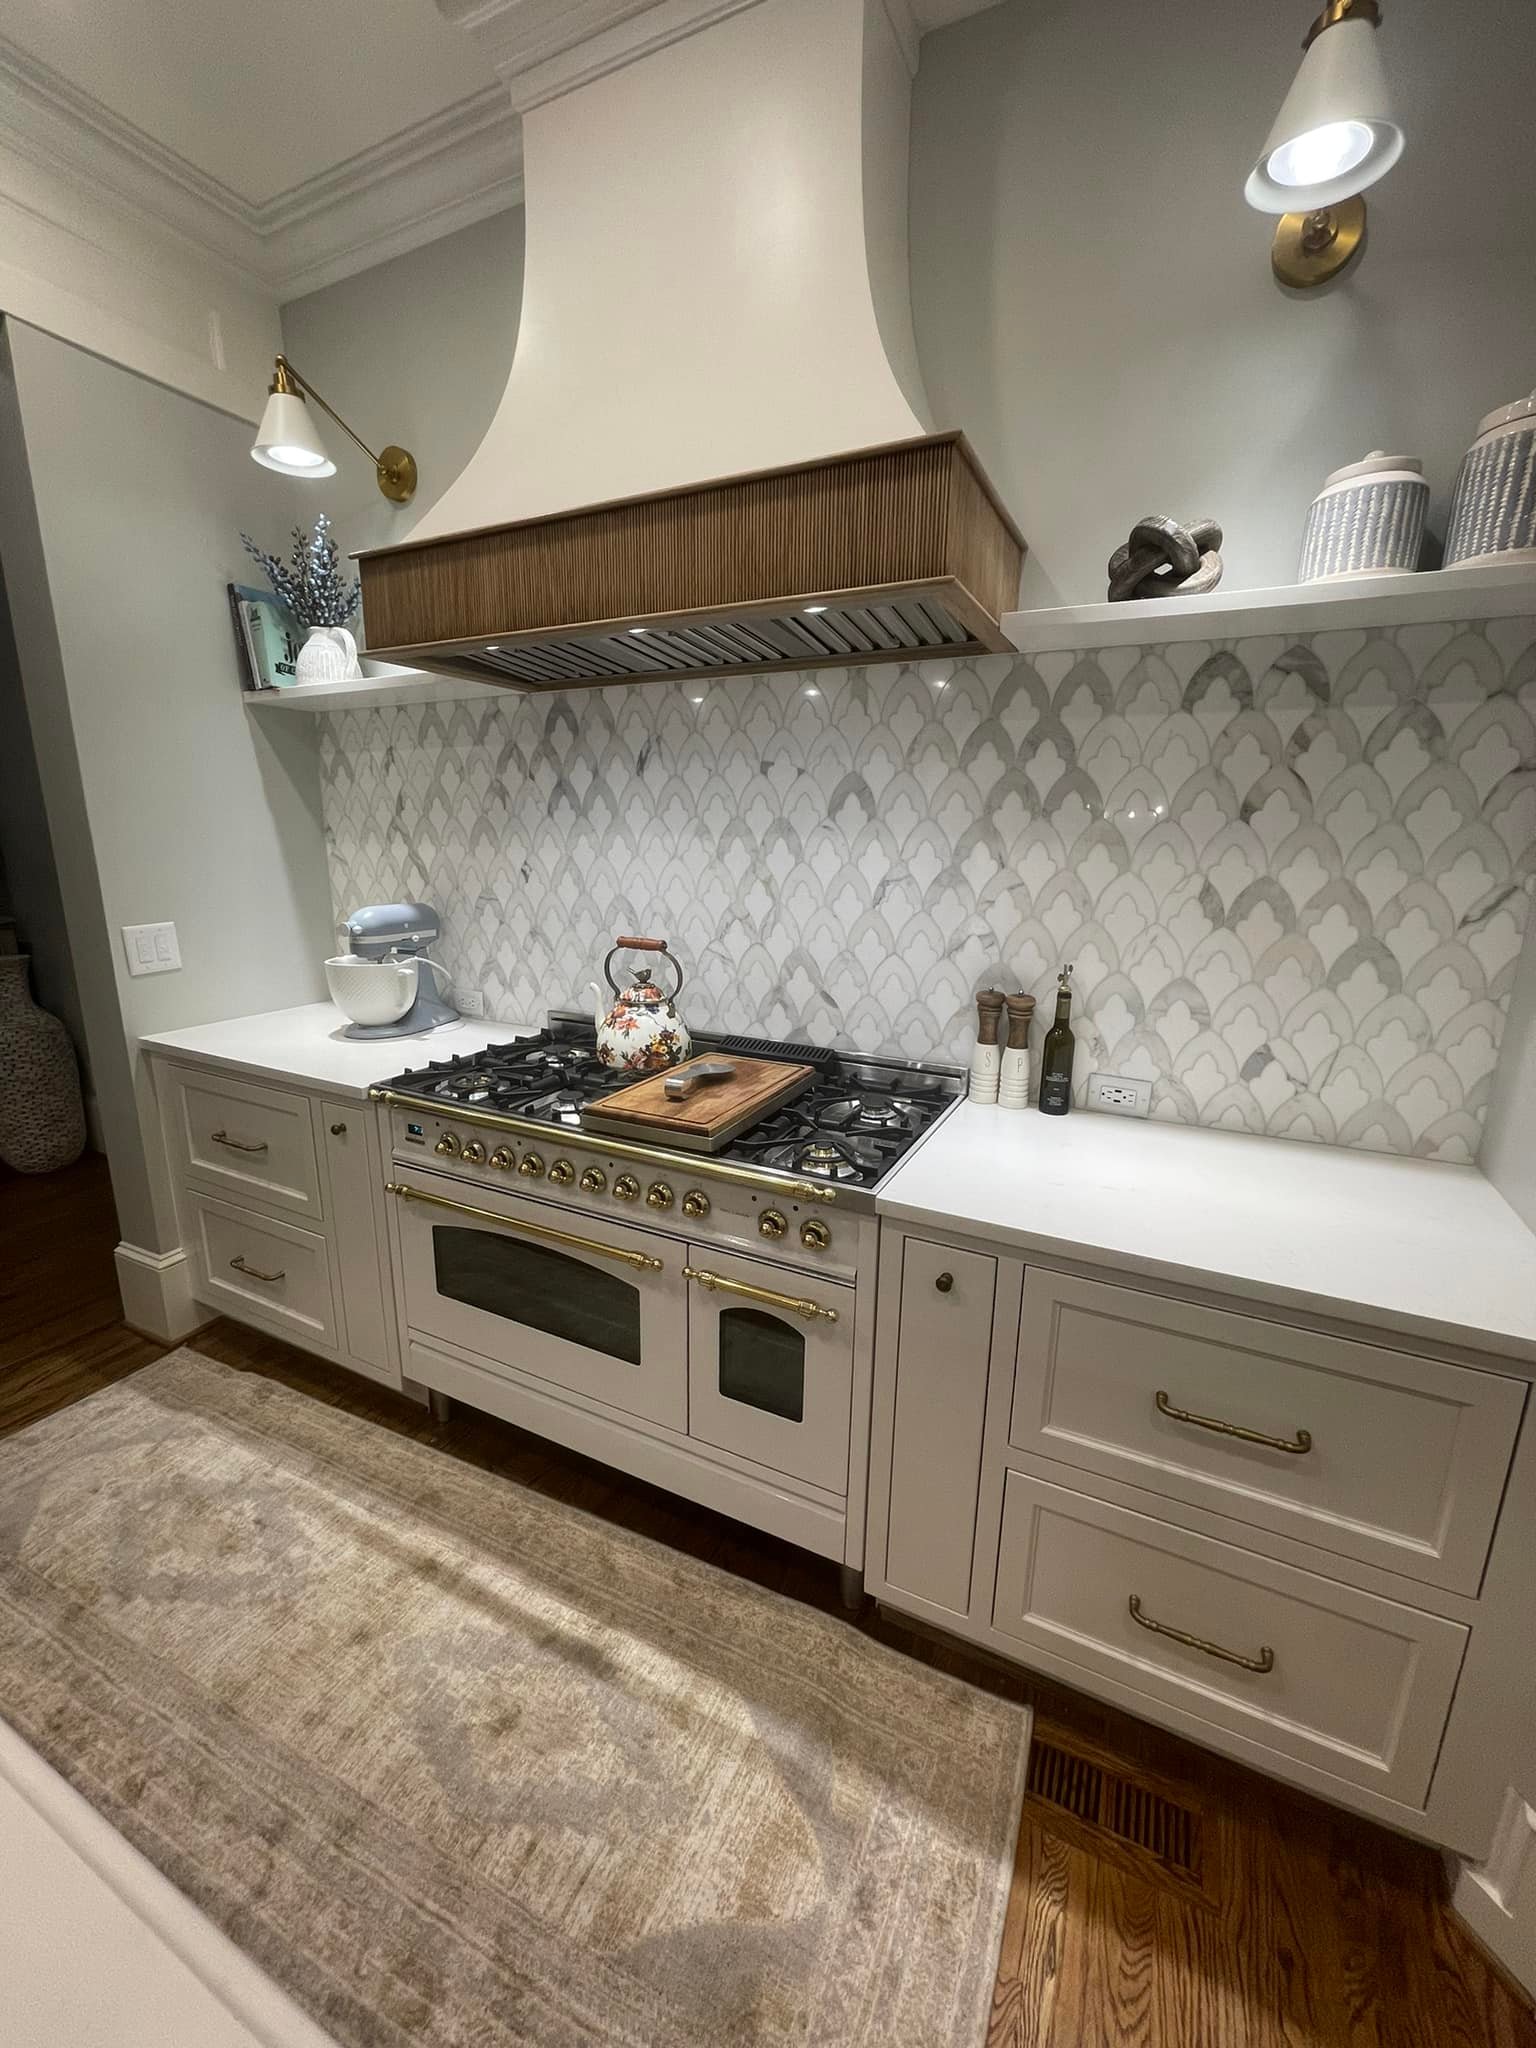
Another reason why we didn’t do pendant lighting… I mean look at the hood and backsplash! 😍 A big design element for the kitchen was this custom island which I really wanted to look like a piece of furniture. My inspo kitchen had this white oak detail with this gorgeous fluting detail that you can see around the top of the island and we incorporated it into the hood. Because we didn’t want to hide the pretty wood detail we went with these ghost stools from CB2. Our countertops are from CR Home Alabama. We went with a white quartz countertop. It has a little bit of a gray/beige cloudy pattern that gives it the appearance of marble without the headaches of marble. On the island countertop, we also did an ogee edge to soften it where everywhere else is a standard edge. I also really liked the white oak detail to pull in the same color as the stone in the fireplace. Husband’s input: It really ties the room together, man. 😆🙄

The backsplash is marble has just the right amount of greys and beiges to tie in the white oak details. There was a lot of debate on whether to run the backsplash up to the ceiling or not. Ultimately we decided to stop at the hood, add quartz shelves (same as the countertops), and then incorporate these gorgeous sconces. The cabinet hardware is antique bronze. I didn’t want to compete with the brass knobs on the range and while I love the look of lacquered brass that patinas over time, my OCD self was worried that they would not patina at the same rate (based on use). But I am very happy with our choice.
I have to also call out the faucet. It’s the bomb 💣 It’s hands-free and basically, worth every penny!
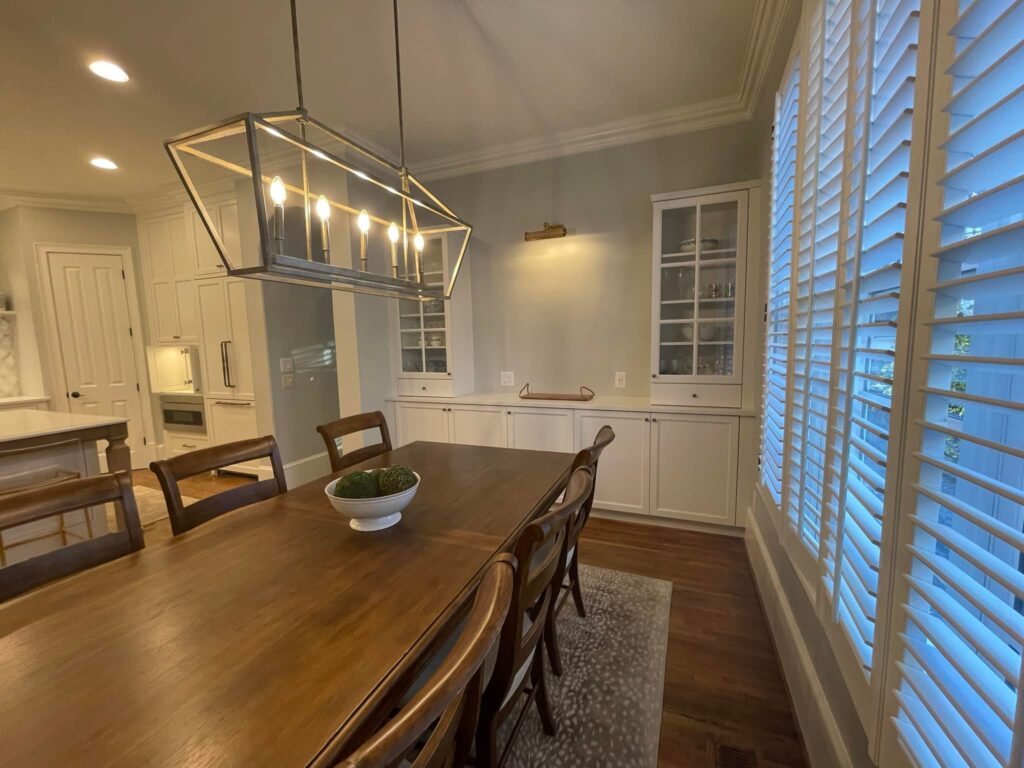
The other part that we wanted to zhuzh up was the dining area. Originally this had a beadboard chair rail. I typically really like beadboard but didn’t feel like it went with our more traditional-styled home. We removed the chair rail and added the built-in buffet and windowed cabinets to create kind of a hutch. These gave us sooooo much more storage space for seasonal china, serving dishes, linens, etc. And now my mom does not have an excuse not to hand over the heirloom china since I have a place to display it now! Also new is the Hooker dining set and rug but we decided to keep our chandelier that John installed when we first moved in.
Few more details…
Our chosen design/layout did not come without some trepidation. We were worried about getting rid of the upper cabinets on either side of the hood but with the large island and new storage in the dining area, I think we ended up with more storage!
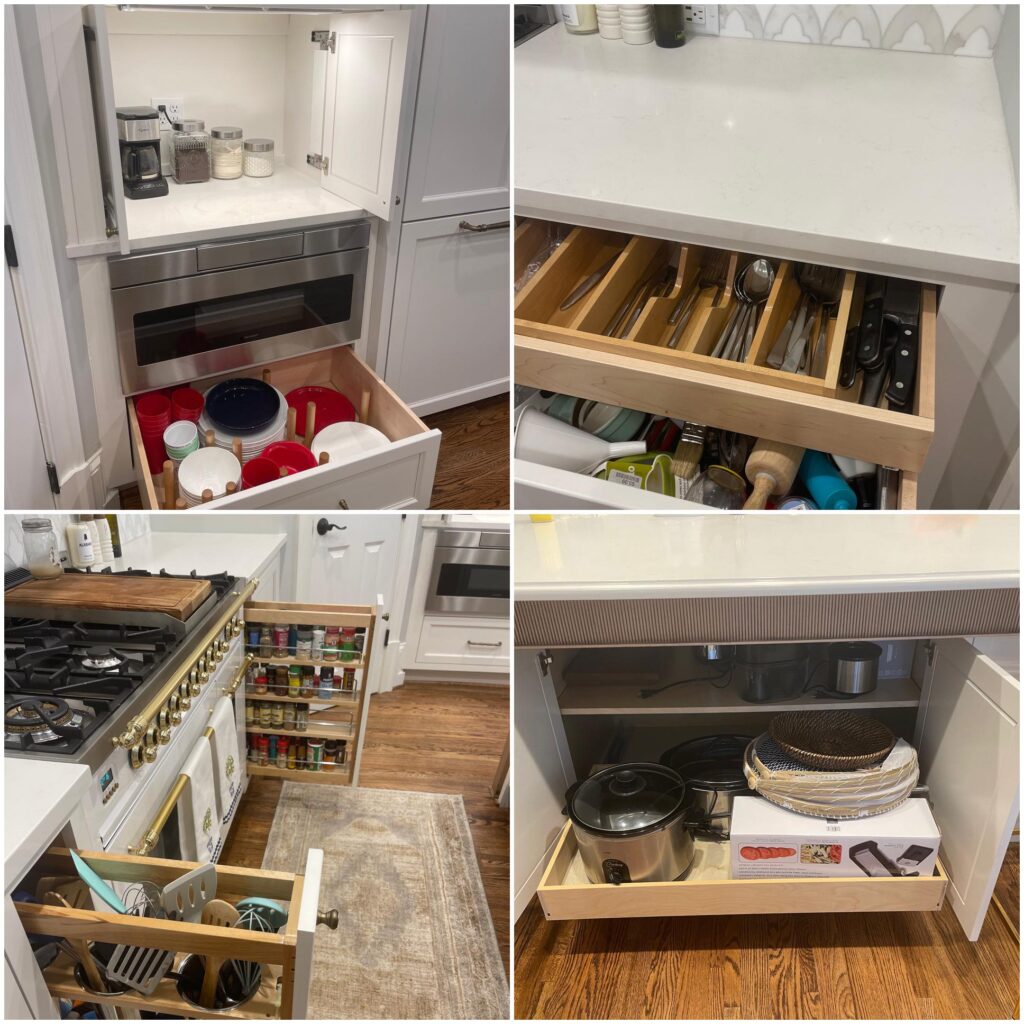
Top Left: We went with the drawer microwave which I have been surprisingly pleased with. We decided to do a plate drawer with a peg system. Also something to get used to, but it works, plus it’s very easy to reach for kiddos. We keep a handful of plasticware for Drake to grab and go and now he can help with unloading the dishwasher (so key!). And then of course is the coffee bar which has doors that close and hid it all away.
Top Right: We have split cabinet drawers to maximize function. This one is our silverware drawer with all the measure cups and baking stuff underneath. On the left side of the range, we have our junk drawer (because let’s be real!) with the tupperware underneath. Doing it this way also allows for symmetry which makes my OCD heart happy.
Bottom Left: We also had built in on either side of the range a pullout for the cooking utensils which normally have to sit on the counter and a pullout spice rack. So easy and convenient to access.
Bottom Right: We literally maximized every square inch of the island. Behind the bar stools, we have a cabinet with a pull-out drawer for the heavier cookware like crackpots and the panini maker.
Honestly, the only thing we did not do in the kitchen was add a pot filler. With the range being right in front of the sink it is definitely not necessary and would have been purely for aesthetic purposes. Plus without, it makes the backsplash stand on its own. I think the only thing we will do down the road is add the tile backsplash to the back of the appliance garage with the coffee maker.
In the end, the remodel took 7 months and 3 days (but who was counting) and it was totally worth the wait! Now it’s time to eat, drink and entertain!
It is gorgeous. Hope you are all enjoying. See you this summer